Practicing with Google Cloud Platform — Google Kubernetes Engine to deploy nginx
Introduction
This article provides simple step-by-step instructions for those who are new to Google Cloud Platform (GCP) and Google Kubernetes Engine (GKE).
I’ll guide you through using GKE to create clusters and deploy nginx.
The instructions below will primarily use gcloud and kubectl to initialize the cluster, which is more convenient than manual management on the Google Cloud interface.

Prerequisites
First, you need to prepare the following:
- Have a GCP account with permission to use Cloud services. If you’re new, you’ll get a $300 free trial to use for 90 days.
- Create a new GCP project.
- Enable Compute Engine and Kubernetes Engine services.
Install Google Cloud SDK and kubectl
For this installation step, refer to the GCP documentation for instructions tailored to your operating system.
Once installed, execute the following commands to check if gcloud and kubectl are installed:
gcloud version
kubectl version
If you see the version result, we’ll proceed to the next part.

Initialize Google Cloud SDK authentication
Please execute the following command to configure Google Cloud:
gcloud initNext, you’ll follow the instructions to log in with your Google Cloud account. Then, you’ll be prompted to configure the default Compute Region and Zone. It’s important to note that different regions have different pricing for machine types. You can check the prices on the Create VM instance UI. However, you should still choose the region that best suits your needs to ensure the best network speed.

Creating GKE Cluster
To create a GKE Cluster, simply execute the following command:
# gcloud container clusters create {cluster name}
gcloud container clusters create k8s-cluster
If you want to specify specific details for the cluster, use the following command:
# gcloud container clusters create {cluster name} \
#   --project {project id} \
#   --zone {zone id} \
#   --machine-type {machine type id} \
#   --num-nodes {number of node}

gcloud container clusters create k8s-cluster \
  --project cluster-1 \
  --zone asia-southeast1-a \
  --machine-type e2-micro \
  --num-nodes 1
Here, I’m using the machine type e2-micro, which has a simple configuration and a relatively cheap price, sufficient for you to follow along with this article.
After successfully initializing the cluster, execute the following command to list the instances currently available:
gcloud compute instances listUse kubectl to deploy nginx
Execute the following command to deploy nginx using a Docker image:
# kubectl create deployment {service name} --image={image name} --replicas={number}
kubectl create deployment service-name --image=nginx --replicas=1
To check the pods currently available, execute the following command:
kubectl get podsNext, I’ll create a LoadBalancer Service to access the Pod from outside the Cluster as follows:
# kubectl expose deployment {service name} --name={load balance service name} --type=LoadBalancer --port={port load balancer service} --target-port={port pod}
kubectl expose deployment service-name --name=service-name-lb --type=LoadBalancer --port=80 --target-port=80
To check the LoadBalancer service, use the following command:
kubectl get svc
# or
kubectl get svc service-name-lb
If you run this command too early, the EXTERNAL-IP column will be <pending>. Please wait a few minutes until you see an IP address in the EXTERNAL-IP column to access it. The result will be as follows:

Cleaning Up Resources
After completing the steps outlined in the article to avoid any unwanted costs, delete the resources and services as follows:
# remove LoadBalancer service
kubectl delete service service-name-lb

# remove GKE cluster
gcloud container clusters delete k8s-cluster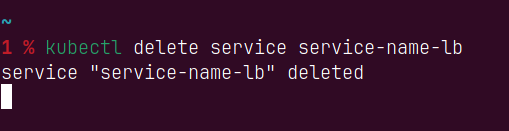
To check if the resources and services have been deleted, you can use the commands I provided earlier or directly check on the Google Cloud Console.
kubectl get svc
gcloud compute instances list
If you have any suggestions or questions regarding the content of the article, please don’t hesitate to leave a comment below!
Some series you might find interesting: